Articles in this section
Windows 10
It is advisable to have ‘Automatic Updates’ enabled on your device. This means any security updates Microsoft releases will be automatically installed, improving your protection.
Turning on ‘Automatic Updates’ for Windows 10.
Step 1 – Locate the settings menu
Select the ‘Start’ menu on your device and locate the settings menu.
You can find this by either locating a link to it from your ‘Start’ menu or by searching for it in the search box.
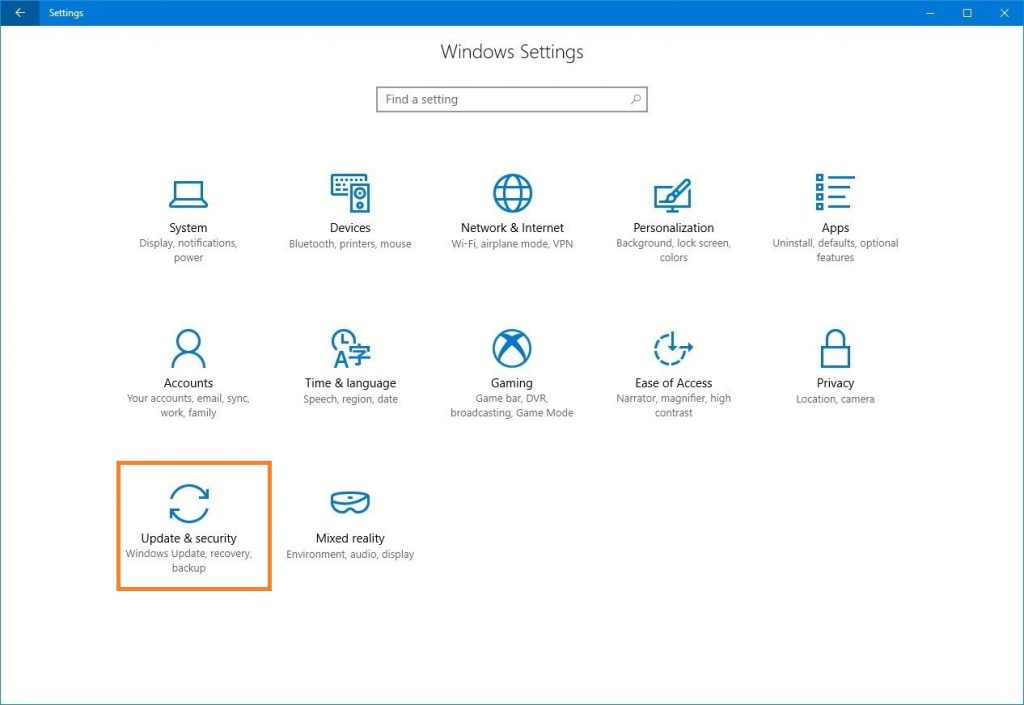
Step 2 – Select ‘Update and Security’
From the following menu, select ‘Update & security’ from the selection menu.

Step 3 – Check for and install outstanding updates
From the following screen, you can check for any outstanding updates and install any pending updates.
When you’re done, you will see a green tick advising that you are up to date.
Step 4 – Turn on automatic updates (recommended)
To maintain the best security practice for your system, we recommend you turn on automatic updates. This helps your system remain as up to date as possible. To do this, select ‘Advanced Options’ from the update screen.
On the following screen, under ‘Choose how updates are installed’ and ensure the menu is set to ‘Automatic (recommended).’
You are now up to date.
Top articles
These are the steps to download VikingCloud Protect to your Windows device.
Read MoreCheck your device for any files that may contain un-encrypted full credit card numbers.
Read MoreExamine your device’s security configuration for common vulnerabilities.
Read More